We are totally crushing on this multi color - "Cranberry Crush" (#9846) - in Mettler Silk-Finish 50 weight cotton. (The purple cone tells you it's 50 weight - how cool is that?)
Did you know you can get Silk-Finish 50 weight cotton in large cones? Multi (variegated) colors like this one are available in 1500 yard cones, making delicious color blends like this totally affordable!
You can use the thread calculator to determine how much Cranberry Crush you'd need to quilt your next project.
We love this goody bag so much, we can't stop making it! We love how it turned out in Valentine's colors! The Mettler Silk Finish Multi color "Cranberry Crush" #9846 was perfect for the heavy topstitching.
You can find instructions for this project from our Fall Goody Bag project(Click here to find it). The only adjustment we made for the Valentine pouch was to use a lightweight batting to make a slightly softer pouch.
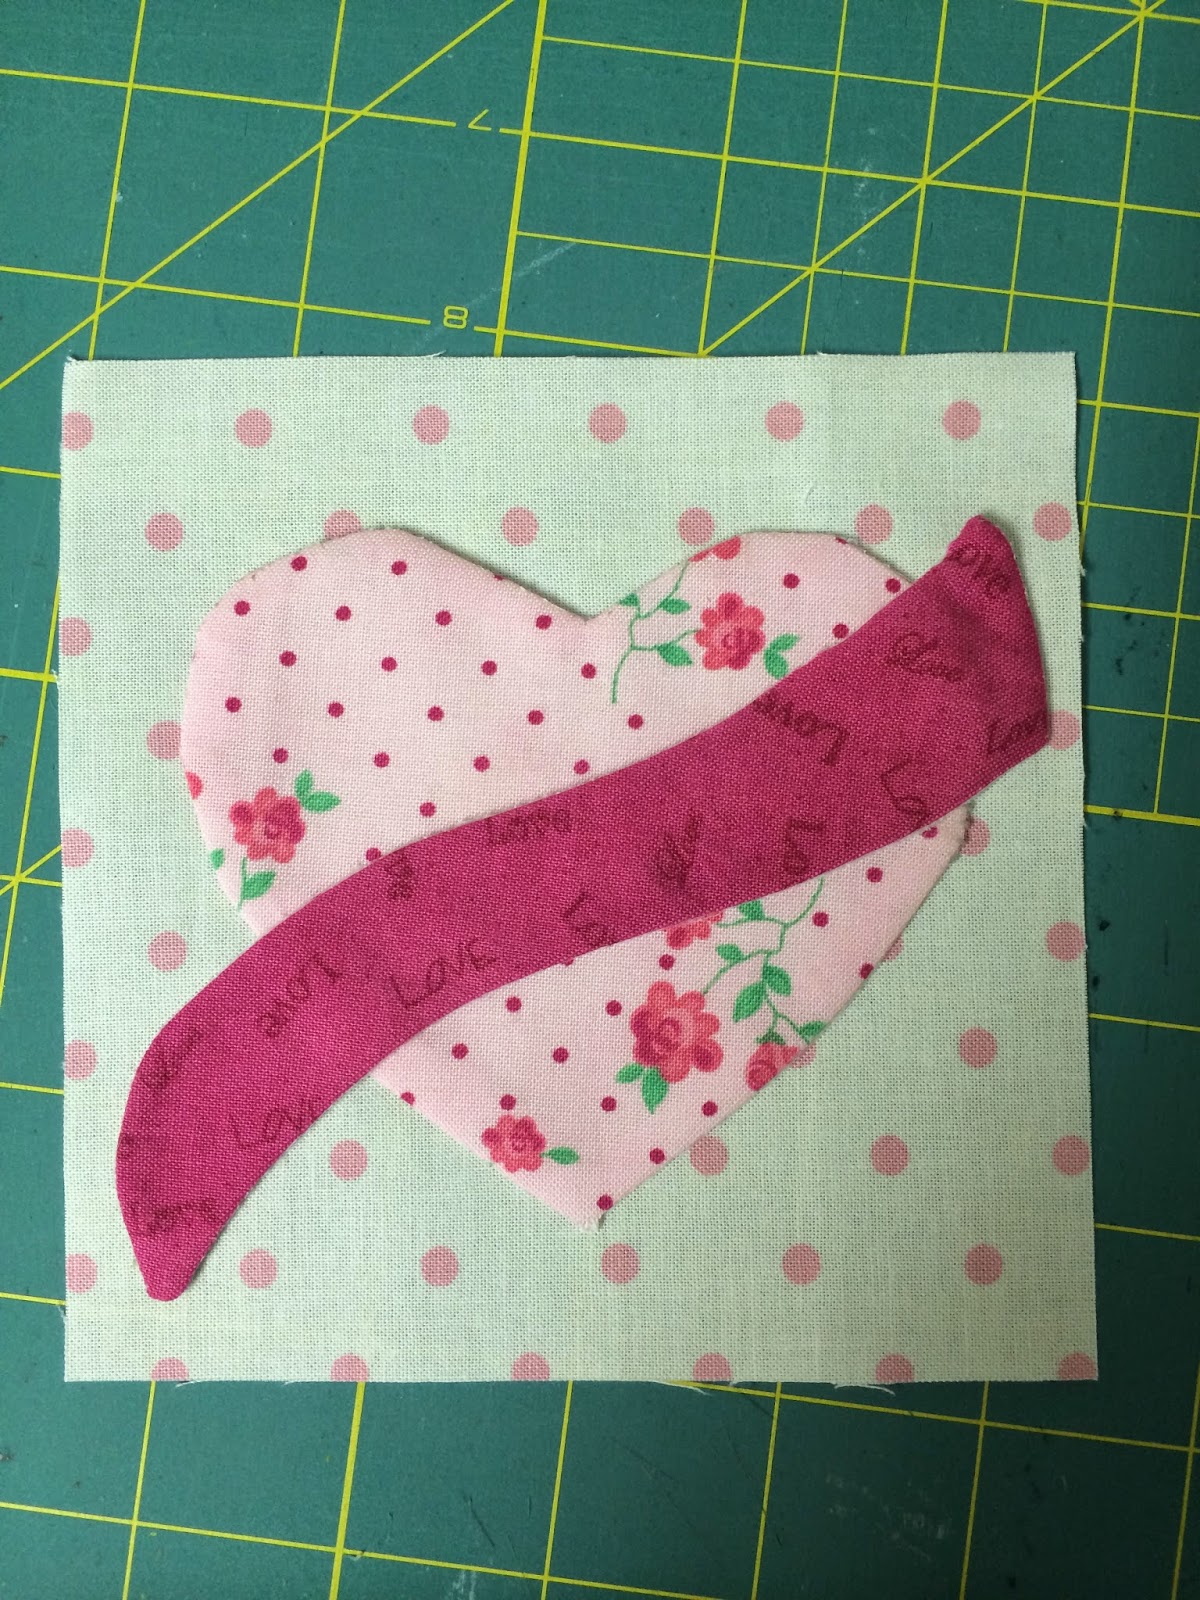
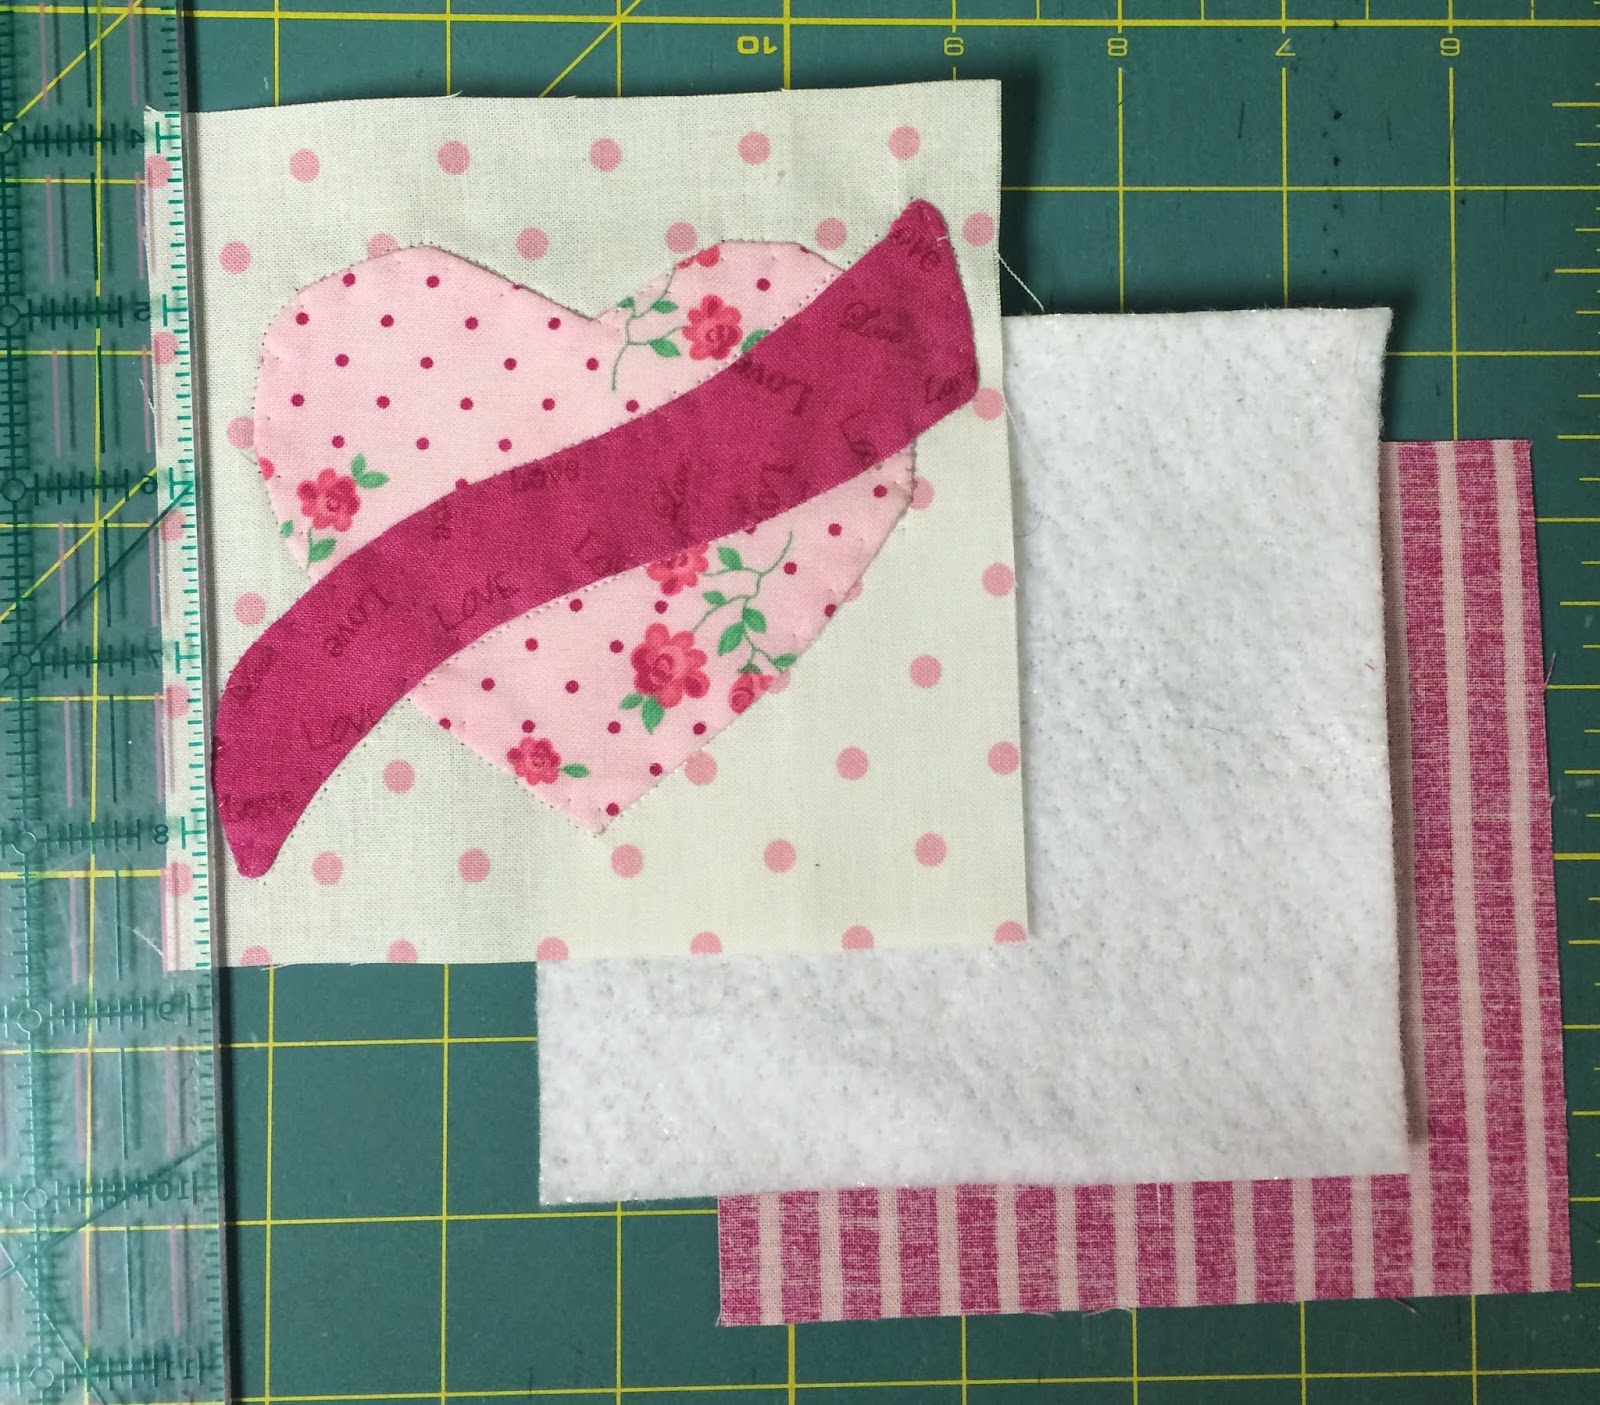
There is still time to stitch up a cozy mug mat for your Valentine! This 5" square mug rug is the perfect landing spot for a cup of coffee or cocoa!
You will need:
Applique Patterns (Download them here).
5" square of background fabric
5" square of backing fabric
5" square tear-away stabilizer
5" square of Insul-bright batting
Scrap fabrics for applique pieces
Web Bond Temporary Adhesive Spray
Transfil clear monofilament thread
Mettler Silk Finish 60 weight cotton thread in a neutral gray
Mettler Silk Finish 50 weight multi (Sample uses Color 9846)
First, prep the fabrics for invisible appliqué. Watch the video below for step by steps on the invisible appliqué process:
Trace the patterns onto muslin or non-woven interfacing. Place the traced muslin with the marked side up onto the right side of the appliqué fabric. (The right side of the appliqué fabric and the marked side of the muslin will both be face UP).
Using Mettler Silk Finish 60 weight thread, stitch through both the muslin and the appliqué fabric, following the traced pattern.
Trim around the appliqué shape approximately 1/4 inch away from the stitched line. Clip corners and curves to prep the fabric for turning.
Cut a small slit in the muslin and turn the fabric right side out. Use a point turning tool to smooth the edges. Press well.
Spray the back of the appliqué pieces with Web Bond temporary adhesive spray.
Place the sprayed pieces onto the background fabric as desired.
Remove the top layer of appliqué and set aside. Layer a single piece of lightweight tear away stabilizer under the background fabric.
Set up the machine with Transfil monofilament in the top and the 60 weight Silk Finish in the bobbin.
Stitch the appliqué to the background fabric using a blind-hem type stitch. The straight line part of the stitch will be in the background fabric and the zig-zag portion of the stitch should "bite" into the appliqué.
Layer the second appliqué fabric in place and stitch on with the same technique.
Use Mettler Web Bond to layer the top fabric, Insul-Bright, and backing fabric together.
Quilt the layers as desired, using Mettler Transfil thread.
Choose a 50 weight Silk Finish multi thread that coordinates with your fabrics.
Round the corners of your mat with sharp scissors.
Thread the machine with the Mettler Silk Finish Multi thread in both the needle and the bobbin. Using an overlock foot, stitch a wide satin stitch along the edge of the mat, encasing the edges in thread.
Trim any excess threads and put your new mug rug to work!
I stumbled across this fabric box tutorial by Joey's quilting company - the cute little boxes looked fun, and the tutorial claimed they could be stitched in 30 minutes or less - that's a challenge I wanted to accept!
The instructions were easy to follow, and sure enough, I had mine stitched up in less than half an hour - even with taking a few pictures along the way.
The instructions say to "quilt as desired" - I did mine in half-inch echoing squares, like the instructions suggest. The only difference - I used my machine's triple-stitch to really emphasize the quilting stitches. I used Mettler Silk Finishe 50 weight cotton in both the needle and the bobbin - and I love how the stitching turned out.
I love the end result so much I'm sure I'll be making many more of these in the future!
We love making our favorite quick projects in holiday fabrics! With a few modifications, we turned this makeup brush roll into a tool caddy for your favorite stitching tools!
To make our modified version, I started by cutting 2 pieces of fabric and one piece of batting 14" by 16".
Layer the fabrics right sides together with the batting underneath.
Using metrosene all-purpose 100% polyester thread, stitch through all layers all the way around the 14" by 16" rectangle, leaving a 4" opening in the center of one 14" side.
Clip the corners and turn the project right side out. through the opening. Press well.
Cut a length of ribbon 24" and fold it in half (right sides together if it has a right side) tuck the folded edge into the opening 8" from the bottom of the rectangle and pin.
Fold up the bottom edge of the rectangle 5".
Lay out your tools in the fold as you'd like to store them.
Use a temporary fabric marker to trace lines to separate your tools.
Stitch along the marks through all layers, securing at each end of the seam.
Fold down the top of the roll approximately 3" (so it just overlaps the bottom pocket.
Edge stitch the two sides and bottom edge of the rollup, being sure to close the opening and stitch the ribbon in place as you sew.
Tuck your tools inside. The top flap being sewn into the edge stitching make the storage more secure.
When using the roll, you can "turn out" the top pocket for easier access to your tools.
Roll up your tools and tie with the ribbon to store!
We used a red/white/green multi and a cranberry red multi in Mettler Silk Finish Cotton 50 weight.
To create the plaid look, start by adding a piece of interfacing or stabilizer to the back of the fabric you will be working with.
Next, mark a grid on your fabric with a removable marker. We marked a grid 2" apart.
Next, thread your machine with the first color of thread. We used the red/green/white multi first. Choose a fairly heavy decorative stitch - one that really shows off the multicolor cotton thread. Use a foot with a center guide to stitch along the lines of your grid.
Stitch the decorative stitch every 2" apart in one direction, and every 4" apart in the other.
Next, thread the machine with the second color. Choose a heave triple straight stitch. Stitch it every 4" (in between the 4" spaced lines with the decorative stitch).
In the opposite direction, add the straight stitch every four inches, spacing it 1" from the first decorative stitch line. Use a seam guide or mark the 1" line with a marker.
Once you have stitched all the lines, remove the marks and then press your fabric.
Trim away any excess fabric that is not stitched.
And voila! You have a piece of plaid fabric you stitched yourself - the perfect start to a fun project!