
Tuesday, December 23, 2014
Instant Easy Stocking
Do you need to make up a stocking to tuck a gift card or other small gift in an instant? This super-simple stocking can be made in just a few minutes!
Saturday, December 13, 2014
Holiday Storage Roll Up
We love making our favorite quick projects in holiday fabrics! With a few modifications, we turned this makeup brush roll into a tool caddy for your favorite stitching tools!
You can find the original instructions here.
To make our modified version, I started by cutting 2 pieces of fabric and one piece of batting 14" by 16".

Layer the fabrics right sides together with the batting underneath.


 Cut a length of ribbon 24" and fold it in half (right sides together if it has a right side) tuck the folded edge into the opening 8" from the bottom of the rectangle and pin.


Use a temporary fabric marker to trace lines to separate your tools.


You can find the original instructions here.
To make our modified version, I started by cutting 2 pieces of fabric and one piece of batting 14" by 16".
Using metrosene all-purpose 100% polyester thread, stitch through all layers all the way around the 14" by 16" rectangle, leaving a 4" opening in the center of one 14" side.
Clip the corners and turn the project right side out. through the opening. Press well.
Fold up the bottom edge of the rectangle 5".
Lay out your tools in the fold as you'd like to store them.
Use a temporary fabric marker to trace lines to separate your tools.
Stitch along the marks through all layers, securing at each end of the seam.
Fold down the top of the roll approximately 3" (so it just overlaps the bottom pocket.
Edge stitch the two sides and bottom edge of the rollup, being sure to close the opening and stitch the ribbon in place as you sew.
Tuck your tools inside. The top flap being sewn into the edge stitching make the storage more secure.
When using the roll, you can "turn out" the top pocket for easier access to your tools.
Roll up your tools and tie with the ribbon to store!
Monday, December 8, 2014
Stitch Your Own Holiday Plaid
We've made plaid fabric here on the blog before by adding a variety of stitches to our fabric - and now we are back at it with holiday colors! Here's how we created this fun plaid fabric that can be used to make your favorite holiday craft - use it for a mug rug, zipper bag, a pocket, or any fun holiday project.

We used a red/white/green multi and a cranberry red multi in Mettler Silk Finish Cotton 50 weight.
To create the plaid look, start by adding a piece of interfacing or stabilizer to the back of the fabric you will be working with.

Next, mark a grid on your fabric with a removable marker. We marked a grid 2" apart.

Next, thread your machine with the first color of thread. We used the red/green/white multi first. Choose a fairly heavy decorative stitch - one that really shows off the multicolor cotton thread. Use a foot with a center guide to stitch along the lines of your grid.


Next, thread the machine with the second color. Choose a heave triple straight stitch. Stitch it every 4" (in between the 4" spaced lines with the decorative stitch).

In the opposite direction, add the straight stitch every four inches, spacing it 1" from the first decorative stitch line. Use a seam guide or mark the 1" line with a marker.


Once you have stitched all the lines, remove the marks and then press your fabric.

Trim away any excess fabric that is not stitched.


Monday, December 1, 2014
Building Your Stash - PolySheen Embroidery Thread

Most of us can't purchase the entire range of colors at once, so here are some guidelines on how to add to your collection methodically!

1. Start with the basic colors. Think the rainbow (Red, Orange, Yellow, Green, Blue, Purple), plus neutrals - (Black, White, Gray, Brown). Most people also add a pink to the mix. Here are some recommended shades of PolySheen for these basic colors:
White: 0015
Black: 0020
Gray: 0142
Brown: 1055
Red: 1902
Orange: 1102
Yellow: 0600
Green: 5422
Blue: 3600
Purple: 2920
Pink: 2550
2. Add a tint (lighter) and a shade (darker) of each of the colors from step one. For example, you'll want several shades of green. If you start with 5422 as your base green, you can add 5740 as a lighter green, and 5326 as a darker green.
3. Add in specialty colors. This will vary from person to person depending on what you like to sew. Here is where you will add colors like flesh tones, teals, dusty colors, neons, or others that are your personal favorites.
4. Add tints and shades of your favorite colors. You may want up to six or seven shades of colors you use often in your clothing or decor so you can create monochromatic designs.
5. As you build your thread collection based on these guidelines and your personal favorites, keep track of what you have at home. You can download a thread chart for PolySheen by clicking here. Print it and mark which colors you have and keep it with you when shopping for thread. Or, even better, download our iPad app, where you can inventory your thread right in the app!
Monday, November 24, 2014
Test Sewing - 40, 50, and 60 weight thread
Have you been trying to decide which thread weight you need for your project? There are lots of guidelines you can follow (See our article on 40, 50, and 60 weight cotton threads).
However, guidelines can only take you so far - the very best way to choose the right thread weight for your project is to do a test stitch!
For example, I stitched two different decorative stitches in three weights of Mettler Silk Finish cotton thread in three weights - 40, 50, and 60 weight (the 40 weight is on top in both sets, 50 in the middle, and 60 on bottom). Seeing a side by side comparison of the three weights makes it easy for me to see which thread I liked best for each application.

Here are some tips for creating a test sample:
- When creating your test sample, use fabric scraps from your actual project to test color and contrast. If scraps aren't available, find fabrics that are similar.
- Set up your sample as close to your final application as possible (like batting and backing, or stabilizer if that's being used) to get the best idea of how your sample will look.
- Label your samples. Include the thread color number, the stitch number, the weight, and any other information (like if you changed your stitch length or width)
- Store samples stapled to a piece of paper and tucked into page protectors in a notebook. You'll be able to find them for easy reference later.
- Test all the stitch types you plan to use on your project. If you'll be doing both decorative stitches and free motion quilting, for example, test both types on your sample. You may even decide to use a different thread for different parts of the project.
- If choosing between two thread weights or colors, stitch them side by side so you can compare more easily.
Monday, November 10, 2014
Comparing 40, 50, and 60 Weight Silk Finish Cotton Thread
Have you found yourself wondering the difference between different weights of thread?
Thread weight is one way to measure the size of thread. Mettler's Silk Finish Cotton is available in 3 weights - 40, 50, or 60 weight.
40 weight is the heaviest, 50 falls in the middle, and 60 weight is the lightest Silk Finish cotton thread. (With thread weight, a larger number indicates a thinner thread). Each of these threads is a 2-ply 100% Egyptian cotton thread.
As the heaviest in the current line of Silk Finish threads, 40 weight cotton thread is ideal for machine quilting where you want the quilting to be prominent. Silk Finish 40 weight is available in 72 colors.

50 weight Silk Finish cotton is commonly used for both piecing and quilting. Available in 250 colors and 54 multi colors, 50 weight is the most popular of the 3 weights. With so many color options, finding the perfect color to quilt your project is easy. 50 weight Silk Finish cotton thread also makes an excellent machine embroidery thread for projects where you want to have the matte finish of cotton, but still have a soft sheen.

60 weight Silk Finish cotton is ideal for piecing intricate blocks. This thinner thread allows for the crispest seams in even the most detailed piecing project. 60 weight Silk Finish is also an excellent choice for machine quilting designs with intricate details, such as microstippling or pebbling projects. The fine thread allows you to add lots of stitches to a project without adding stiffness or bulk. Silk Finish 60 weight is available in 214 colors.

New in 2014 - you'll find that the spools and cones are color-coded for easy identification! 40 weight is found on brown spools, 50 weight on purple spools, and 60 weight on green spools! Look for these new color-coded spools at your local dealer.
You can download this handy quilt calculator to tell you how many spools of any of the Silk Finish cotton threads you need to quilt your project.
Also, check out our new iPad app which you can use to inventory your threads, print thread charts, or find a local dealer!
Thread weight is one way to measure the size of thread. Mettler's Silk Finish Cotton is available in 3 weights - 40, 50, or 60 weight.
40 weight is the heaviest, 50 falls in the middle, and 60 weight is the lightest Silk Finish cotton thread. (With thread weight, a larger number indicates a thinner thread). Each of these threads is a 2-ply 100% Egyptian cotton thread.
As the heaviest in the current line of Silk Finish threads, 40 weight cotton thread is ideal for machine quilting where you want the quilting to be prominent. Silk Finish 40 weight is available in 72 colors.
50 weight Silk Finish cotton is commonly used for both piecing and quilting. Available in 250 colors and 54 multi colors, 50 weight is the most popular of the 3 weights. With so many color options, finding the perfect color to quilt your project is easy. 50 weight Silk Finish cotton thread also makes an excellent machine embroidery thread for projects where you want to have the matte finish of cotton, but still have a soft sheen.
60 weight Silk Finish cotton is ideal for piecing intricate blocks. This thinner thread allows for the crispest seams in even the most detailed piecing project. 60 weight Silk Finish is also an excellent choice for machine quilting designs with intricate details, such as microstippling or pebbling projects. The fine thread allows you to add lots of stitches to a project without adding stiffness or bulk. Silk Finish 60 weight is available in 214 colors.
New in 2014 - you'll find that the spools and cones are color-coded for easy identification! 40 weight is found on brown spools, 50 weight on purple spools, and 60 weight on green spools! Look for these new color-coded spools at your local dealer.
You can download this handy quilt calculator to tell you how many spools of any of the Silk Finish cotton threads you need to quilt your project.
Also, check out our new iPad app which you can use to inventory your threads, print thread charts, or find a local dealer!
Monday, October 27, 2014
Quilt Market Day Two: The Quilts!
Here are just a FEW of the our favorite quilts from the show today!
What an amazing display of talent and creativity!
What an amazing display of talent and creativity!
Sunday, October 26, 2014
International Quilt Market Day One - the Vendor Mall!
Wow, we are having a great time at Houston Quilt Market! Here are some highlights from Day One - we spent today exploring the vendor mall. Check with us tomorrow for pictures of some of our favorite judged quilts!
Wednesday, October 15, 2014
Pocket Tutorial Roundup
Who doesn't love a nice pocket? They're so handy for stashing things, and can also make such great decorative elements to our projects!
We've rounded up a few helpful tutorials for pocket-making for you - Enjoy!
From Joyfoolery, a tutorial on making a curved-bottom pocket without burning your fingers from pressing!

Check out this accordion pocket from Jamie Christina! What a fun addition to an apron or bag!


We've rounded up a few helpful tutorials for pocket-making for you - Enjoy!
From Joyfoolery, a tutorial on making a curved-bottom pocket without burning your fingers from pressing!
Check out this accordion pocket from Jamie Christina! What a fun addition to an apron or bag!
A perfect welt pocket can make an outfit. Try this tutorial from WorkRoom Social.
This gathered pocket tutorial from Tye Dye Diva is simply adorable:
And here is a whole series of pocket tutorials from ikat bag!
Sunday, September 21, 2014
Phone Charger Caddy
Make this handy phone charger caddy for any size phone. Simply follow the instructions below to make a pouch to hold your phone while it charges - It's especially handy when travelling!
Download a pdf version of these instructions here.

What You Will Need:
• Mettler Metrosene® thread
• 1 Curtain grommet, 1 1/2 inch center diameter
• Normal sewing supplies
• 1/4 yd X 42 inches fabric (or 2 fat quarters for fabric if different lining fabric wanted as shown)
• 1/4 yd X 21 inches piece of heavy cutaway stabilizer


Step 4: It will be easier to sew the edge stitching before you put the grommet in. To do this, start at the bottom corner where the fold is and sew around 3 sides catching the opening you used for turning. Depending on the usage, you may want to backstitch the entrance to the pocket several times. Now take a snip with your scissors in the middle of the grommet circle to give you a starting place. Cut out the hole. Snap in the grommet.
Step 5: To use your pocket for cord storage, simply place the cord you have in the pocket and fold over


Download a pdf version of these instructions here.
What You Will Need:
• Mettler Metrosene® thread
• 1 Curtain grommet, 1 1/2 inch center diameter
• Normal sewing supplies
• 1/4 yd X 42 inches fabric (or 2 fat quarters for fabric if different lining fabric wanted as shown)
• 1/4 yd X 21 inches piece of heavy cutaway stabilizer
Determining Project Size
1. Measure your phone length and width with case if you have one.
2. Add 9 inches to length and 2 inches to width to determine fabric and stabilizer size needed.
Example: Phone w/case in picture was 4 1/2 inches long and 2 1/2 inches wide so the fabric and stabilizer were cut to 13 1/2 inches long and 4 1/2 inches wide.
Step 1: Cut out 2 pieces of fabric and 1 piece of stabilizer to size determined above and stack with fabric right sides together and the stabilizer on top.
Step 2: Sew around the edges using a 1/4 inch seam
leaving 3 to 4 inches on
one side to turn right side out. Clip
corners and turn. Use a round pointed
object
such as a chopstick to poke out the corners.
Step
3:
Press, making sure all corners are squared and the opening is tucked in-
side so you can sew it closed. We’ll catch that later. Measure the full length of your
fabric, divide the distance
by 3 and turn fabric up the 1/3
distance measurement.
Pin. Using manufacturer’s grommet template, draw the pattern for the grommet in the center near the top. Sew just outside your marked circle before cutting. This will assure all your layers stay together when cutting.
Pin. Using manufacturer’s grommet template, draw the pattern for the grommet in the center near the top. Sew just outside your marked circle before cutting. This will assure all your layers stay together when cutting.
Step 4: It will be easier to sew the edge stitching before you put the grommet in. To do this, start at the bottom corner where the fold is and sew around 3 sides catching the opening you used for turning. Depending on the usage, you may want to backstitch the entrance to the pocket several times. Now take a snip with your scissors in the middle of the grommet circle to give you a starting place. Cut out the hole. Snap in the grommet.
Step 5: To use your pocket for cord storage, simply place the cord you have in the pocket and fold over
Monday, September 1, 2014

Saturday, August 23, 2014
Fall Goody Bag
Isn't this a sweet little soft candy bowl? And you can whip it up in no time flat!

We modified our easy instant gift bag slightly to create this candy dish.
Supplies
1 piece orange fabric 16" square
1 piece green fabric 16" square
1 piece reinforced batting (such as Battilizer) 16" square
Edgestitch foot
Mettler Silk Finish 50 Weight Cotton thread in a contrasting color for topstitching
Mettler Silk Finish 50 Weight Cotton thread in a matching color for assembly
1 1/2 yards brown 3/8" grosgrain ribbon
Instructions
Start by cutting the fabrics and batting to 16" square.
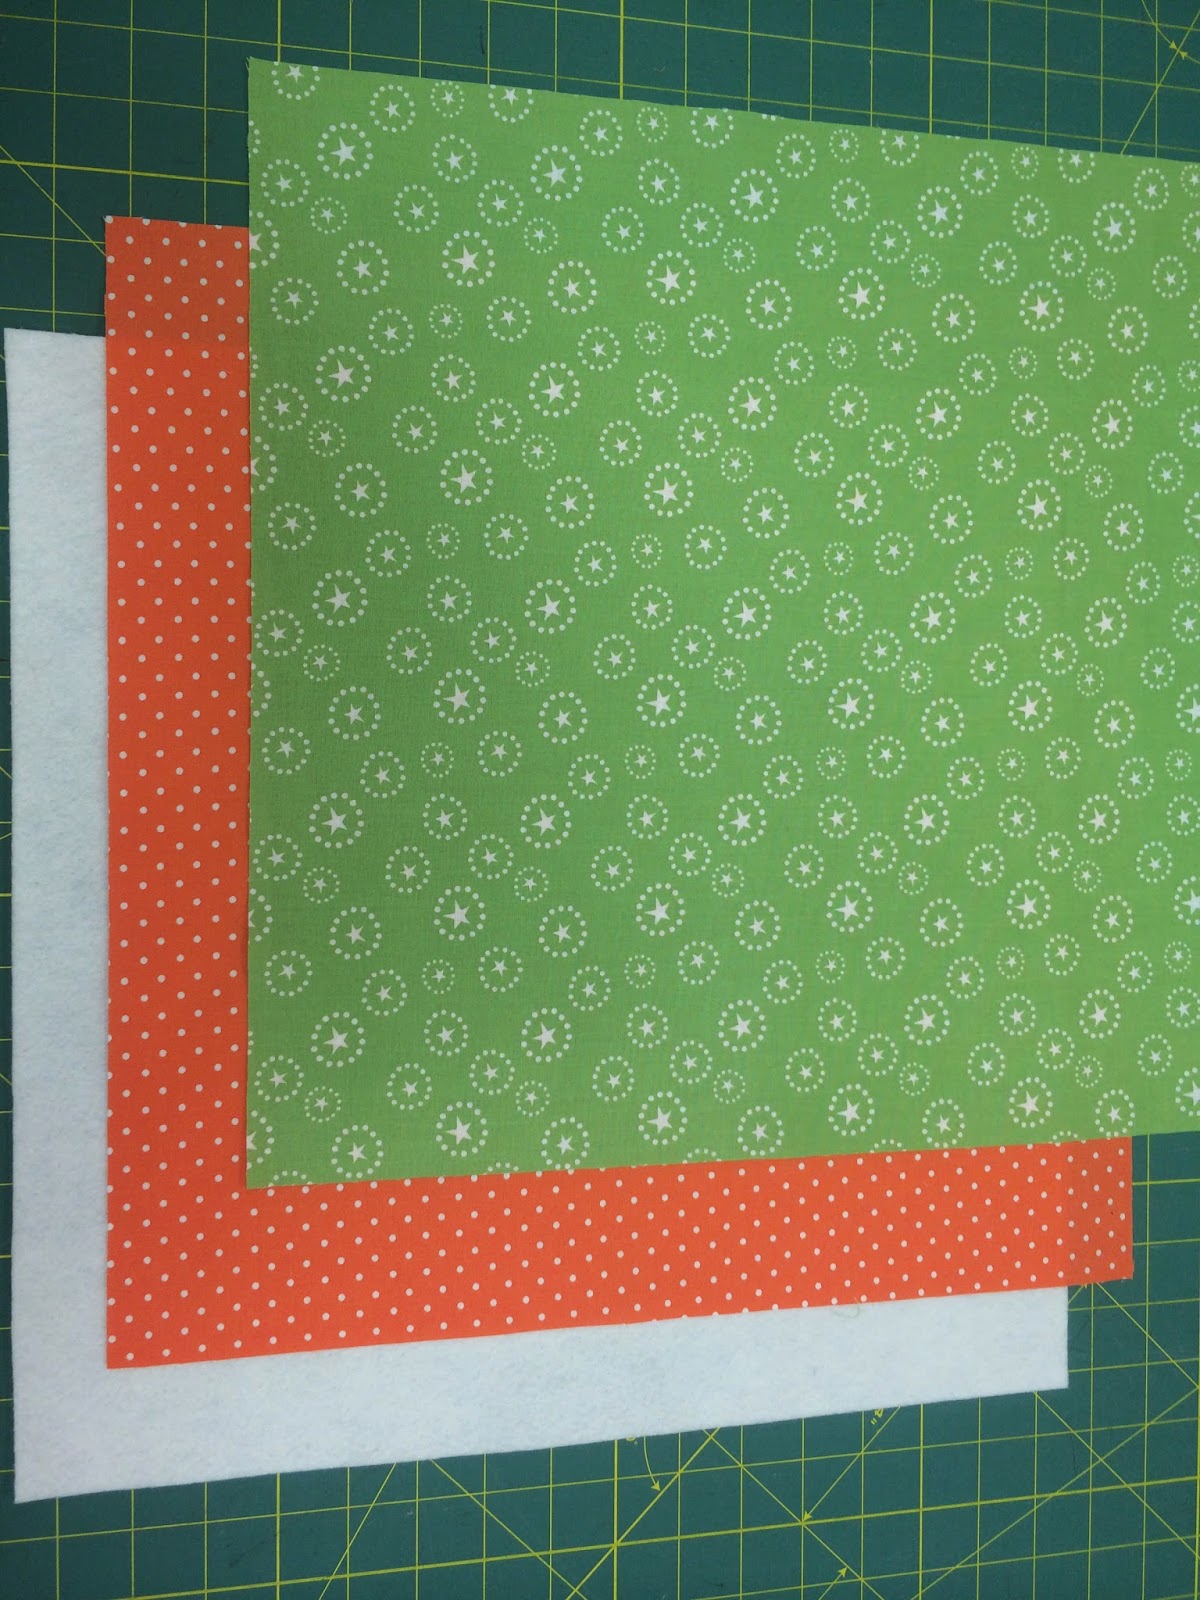
Place the two fabrics right sides together with the batting on top.


Stitch 1/2" from each folded edge of each flap to form a casing for the ribbon. Backstitch at the beginning and end of each flap.

Thread the ribbon through all four casings, using a large safety pin or bodkin to pull it through.

Pull the ribbon tails tight and gather the casings. Tie in a bow and your goody bag is ready to be filled with treats!

We modified our easy instant gift bag slightly to create this candy dish.
Supplies
1 piece orange fabric 16" square
1 piece green fabric 16" square
1 piece reinforced batting (such as Battilizer) 16" square
Edgestitch foot
Mettler Silk Finish 50 Weight Cotton thread in a contrasting color for topstitching
Mettler Silk Finish 50 Weight Cotton thread in a matching color for assembly
1 1/2 yards brown 3/8" grosgrain ribbon
Instructions
Start by cutting the fabrics and batting to 16" square.
Stitch all the way around the square through all layers, using a 1/4" seam. Leave a 5" opening on one side for turning. Be sure to backstitch at the beginning and end.
Clip the corners and turn through the opening.
Tuck in the opening and press. Edgestitch all four sides of the square using a triple or other heavy straight stitch. Stitch the opening closed as you topstitch.
Place the square orange side up. Fold the four corners of the bag toward the center as shown. The folded corners should measure 4" from the fold to the triangle tip. Press in place.
Thread the ribbon through all four casings, using a large safety pin or bodkin to pull it through.
Pull the ribbon tails tight and gather the casings. Tie in a bow and your goody bag is ready to be filled with treats!
Subscribe to:
Posts (Atom)