Wednesday, July 30, 2014

Free Motion Fillers

Do you love free-motion quilting? I know I do!

One of my favorite things to do with free-motion is to learn new "fillers" - pattern types that I can use to fill in open space in my quilts. New to fillers? Here are some fun tutorials and links you might find helpful:

Faux Bois (Woodgrain) Pattern:


Spiral Chain:


Stippling, Hooks, and Stars:


Bananas and Berries!:

Wednesday, July 23, 2014

How to Free Motion Quilt a Faux Bois Pattern

We love the look of faux bois (woodgain), especially when it is free-motion quilted!

Watch this video to learn the technique to create this free-motion pattern.

Wednesday, July 9, 2014

How to Do a Hand Look Quilt Stitch by Machine

Did you know you can create a hand-look stitch with your sewing machine? This technique is created by using Transfil monofilament thread in the needle and 50 weight Mettler Silk Finish cotton quilting thread in the bobbin. The bobbin thread pulls to the top at intervals, creating a look that resembles hand stitching.


Many machines have a built-in stitch to create this look. Check with your local dealer or in your manual to see if you have a specific stitch for this technique. If your machine does not have this option, but has memory capabilities, you may be able to combine straight stitches with a backstitch to get a similar look. A triple straight stitch can also give a similar look with some tension and length tweaking.

Here are some tips for creating this look:

1. Thread your needle with Mettler Transfil monofilament thread in smoke or clear. Use smoke for dark fabrics and clear for light fabrics. If you are not sure which to use, spool a little onto your fabric. Whichever thread "disappears" on the fabric is the one you should use.

2. Thread your bobbin with Mettler Silk Finish thread in 50 weight. Choose a color with high contrast to your fabric. A high contrast between the thread and the fabric emphasizes the hand-look.

3. Tighten your needle tension. The amount of change will vary by machine. A few machines will actually automatically adjust the tension when you select the hand-look quilt stitch, so check your manual first.

4. Use a size 90 topstitch needle. This will make a bigger whole in the fabric to allow the bobbin thread to pull back through.

5. Experiment with this stitch on a scrap piece before using it on your actual project. You may need to make slight adjustments in the tension or stitch length to get the look you want.


Sunday, July 6, 2014

The World is But a Canvas to the Imagination


And any canvas is a lot more fun when you have all the colors!

Enter to Win Seracor Thread!

We do love a good giveaway, don't you? You can enter to win FOUR cones of Seracor thread below.

Learn more about Seracor by reading our thread profile.

You can get bonus entries by sharing this contest on Facebook, Twitter, or Pinterest, and for following us on any of those platforms!

a Rafflecopter giveaway

Seracor Thread

Seracor is a 50 weight, 100% polyester  thread available in 2500m cones (2734 yards) This high-quality, low-lint thread is an excellent choice for serging (overlocking).

Each cone of Seracor is labeled for easy identification, look for the PINK cones!

Strong and durable, it also has ideal “elongation” – meaning it can stretch without breaking. This makes it perfect for seams in knits. 

Seracor thread does not shrink, so you never have to worry about your seams puckering after washing.

Seracor is made with a strong core wrapped in smooth fibers to give it a smooth appearance and to allow it to lay flat in seams.


These same properties also make Seracor an excellent choice for long-arm quilting. It is a reliable and economical thread choice for the professional or serious long-arm quilter. 


Seracor comes in 50 colors. Look for this white display cabinet at your dealer's store.


Download a thread chart below.

Thursday, July 3, 2014

Earbud Zip Pouch

This pouch from Dog Under My Desk is one of the cutest tutorials on the 'net! You've probably seen it floating around Pinterest.
You'll find a free tutorial for personal use at the link above, or you can purchase a pdf pattern if you want to make them to sell!

We loved this so much, we stitched one up using the fabric we decorated with our plaid fabric tutorial. We think it turned out great!

If you follow our plaid fabric tutorial instructions, you will have stabilizer or interfacing already on your fabric, so you can skip the batting recommended in the tutorial. Other than that, you can make this pouch just following the instructions.

When you cut out your pattern pieces, simply cut right through your stitched lines. They will all get tacked down in the seams.


Be sure to check out Dog Under My Desk for this and other great tutorials!

Plaid Sewing Roundup

Jen Beeman of Grainline Studio describes how to match plaids by cutting your fabrics in a single layer.
Read her tutorial here:
On Sewaholic, we found a nice tutorial on matching plaids using a more common method - matching the plaids while folded before cutting:
This article from Stitch Pause Rip gives lots of hints and tips for matching and choosing plaids:


This detailed video from Professor Pincushion discusses a plaid matching method for precisely perfect plaids, even on more complex pattern pieces.


In this fun post, we show how to create your own stitched plaid with your zig-zag and triple stitches.


Wednesday, July 2, 2014

Create Your Own Plaid Fabric

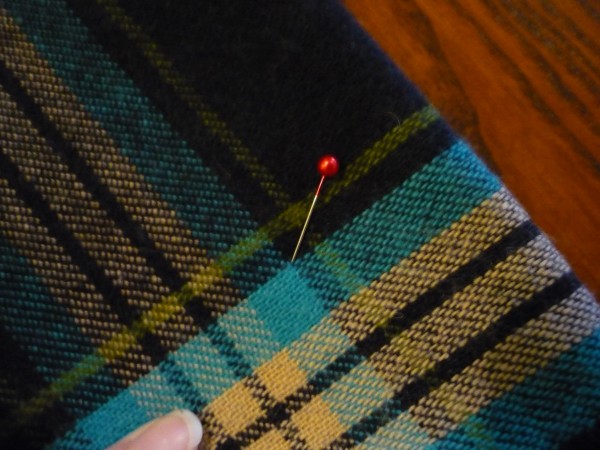
We LOVE plaid fabric. What's more fun than a summer madras? Making your own!

You can create your own lovely plaid fabric with just a few simple steps - what a fun way to create a unique fabric for that special little project.

Start by lining your fabric with a fusible stabilizer or medium weight fusible interfacing. We like a fusible tear-away because it gives the fabric just enough stiffness to stitch without puckering.

 Choose three thread colors. We did this plaid with Mettler Silk Finish 50 weigh in three summery colors. The finish on this thread is just smooth enough to stand out, and just matte enough to look like it is woven into the fabric.

Mark your fist set of lines. On our sample, we marked lines 1.5" inches apart. Draw both vertical and horizontal lines.


Thread your bobbin with a lighter weight thread than you will be stitching with on top. We used Mettler Seracor thread in white. If you have the option, thread your bobbin with "embroidery tension" - through the hole in the finger on the bobbin case if it has one. If you do not have a finger on your bobbin case, your machine may have a setting for adjusting the bobbin tension for embroidery - check your manual or with your local dealer.

With the first color (in our case, the light green), stitch a wide zig-zag. The zig-zag stitch should be shorter than normal, but not as short as a satin stitch. You want the base fabric to show through. On most machines, this will be a length of 1 to 1.5. Stitch on your marked lines, using the center mark on your sewing machine foot to guide your stitching along your marked lines. Stitch all of the lines in one direction first, then go back and stitch the perpendicular lines.


Once you have finished stitching the first set, mark your lines for the second set. We made our second set 1" apart.

 Thread your machine with your second color (in our case, the blue-green color), and stitch along your marked lines with a triple straight stitch or other heavy straight-line stitch.

Mark your lines for your third set of stitching. We made ours 1 1/4" apart. 

 Thread the machine with the third color (in our case, pink). Stitch with a very narrow zig-zag stitch (about a 1 on most machines). The length of the zig-zag should also be about a 1. Stitch along the marked lines.
Trim your thread tails, and your fabric is done! You can now use this fabric in any project, just like you would any other piece. Don't remove the stabilizer - just let it function as an interfacing in your project.