Saturday, May 31, 2014

Patriotic Gift Bag

We loved this charming gift bag project so much we decided to do it up in summer red and white!


We used Mettler Silk Finish 60 weight and a heavy triple stitch to do topstitching that really stands out.

This bag comes together in less than 30 minutes, and is perfect for holding treats, candy, or a small gift. We filled ours with sweet peppermints!


The instructions for the gift bag/potpourri bag can be found in this previous post.

Thursday, May 29, 2014

Applique Options

When you think of machine applique, you normally see blanket stitch or satin stitch edges. Why not mix it up? Use some of those tons of decorative stitches that came with your sewing machine to create an applique sampler.


Start by spraying a piece of tear-away stabilizer with Mettler Web Bond and adhering it to the back of a piece of solid black fabric.


Cut triangular scraps in bold primary colors using a rotary cutter and ruler.


Spray the backs of the triangular fabrics with Mettler Web Bond temporary adhesive spray.


Arrange the triangles onto your base fabric and smooth into place.


Place a clear applique foot onto your sewing machine. Use a foot with a center guide mark.

Thread the needle with 50 weight Silk Finish Multi (Color 9824) and the bobbin with silk finish 60 weight cotton. Using a lighter thread in the bobbin thread for applique will reduce bulk and so the bobbin thread will not show on the top of the project.

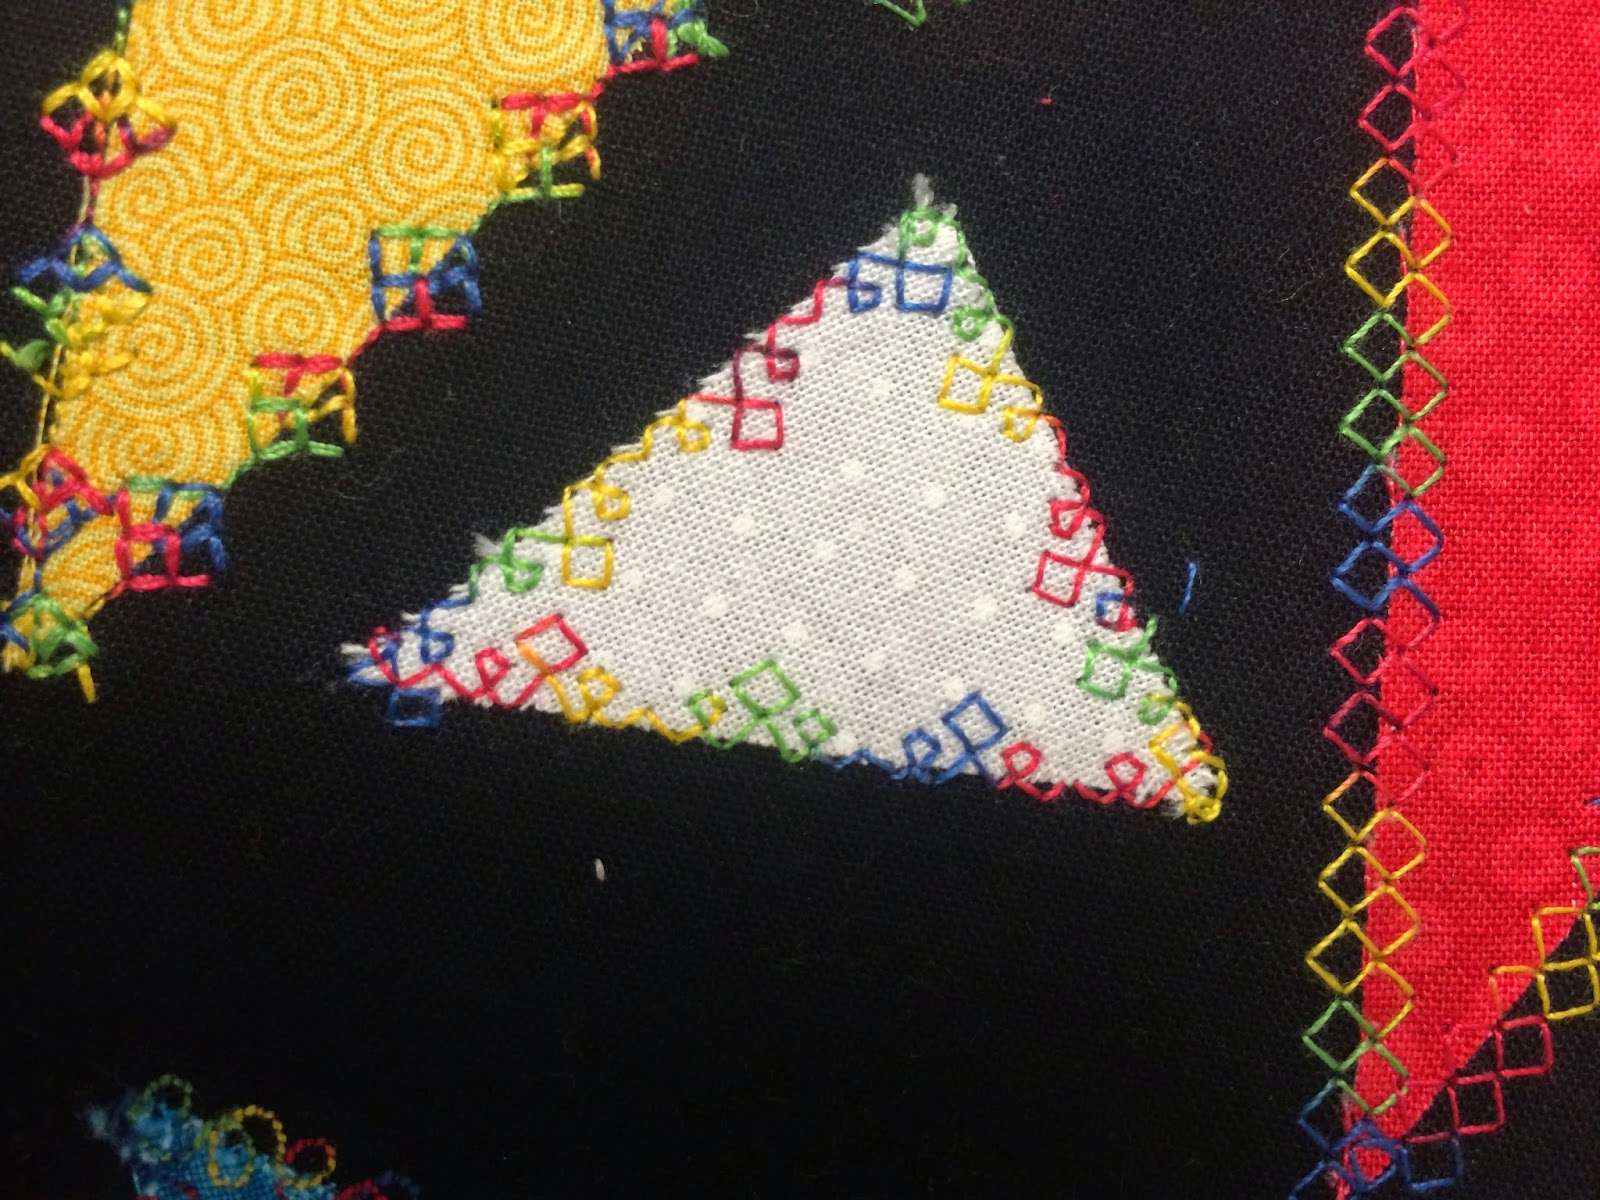
Stitch around each triangle shape with a different decorative stitch, pivoting at the corners.

Some decorative stitches will look best if the center of the stitch is over the edge of the applique, while others will look best if the edge of the stitch is aligned with the edge of the fabric. Experiment on scraps to determine the best placement.


Once you've stitched down all your triangles, turn your sampler into a wallhanging, a placemat, a book cover, or another fun project.


Wednesday, May 21, 2014

Redwork with Cotton Thread

If you have done much redwork with your embroidery machine, you probably already love it - the designs sew out quickly and have a lovely vintage feel.

While I do most of my embroidery with Mettler Polysheen, I have found a new love for doing redwork with Mettler Silk Finish cotton thread in 60 weight. This beautiful thread has a very soft sheen and gives a more handmade look to my project.

This design was stitched using Mettler Silk Finish 60 weight thread using designs from Embroidery Design Studio.

 Mettler Silk Finish is mercerized for strength, so I didn't have any problems stitching my design even at high speed.

At first I worried about the design holding up in the wash - red cotton thread on white fabric seemed like asking for a pink project! Then I learned that Mettler Silk Finish is colorfast - it is dyed with a special process that keeps the thread from bleeding. Here is my same design after being washed, dried, and ironed:
Here's a handy tip for you - before turning your redwork design into a quilt or pillow, check the back of your project for any little red thread tails - these tail ends can show through your white fabric and are next to impossible to remove once your project is stitched together!

Monday, May 19, 2014

Wednesday, May 14, 2014

Shortening Jeans While Saving the Original Hem

Need to shorten jeans in a hurry? With this technique, you can keep your original hem and don't even have to cut away any fabric!


 Supplies:

  • Mettler TRANSFIL Monofilament Thread (use clear for lighter jeans and smoke for dark jeans)
  • Pair of jeans in need of hemming


Step 1. Measure how many inches the jeans need to be shortened. Take that number and add 1, then divide that number in half. This is the number you will need.


Step 2. Turn up the hem of your jeans the number you just determined. Pin.


Step 3. Change to your zipper foot and sew right next to the original hem as shown. Using a zipper foot is essential to get as close as possible to the original hem.


Step 4. Turn the folded area back inside the jeans and press. 


Step 5. Top stitch the folded area close to the original hem stitching with your basic sewing foot or edge stitch foot. Using the Transfil thread will make this topstitching nearly invisible. 


Tuesday, May 13, 2014

Faux Mitered Corner

Fake a mitered corner! This tutorial will show you how to get a mitered corner look with quick and easy technique.


Thread Giveaway!

Mettler Silk Finish 100% cotton thread has long been a favorite of quilters. Did you know that you can now get Silk Finish in 50 weight or 60 weight in a large cone?

To celebrate, we want to give away 2 sets of cones! Each set will have 2 cones of 60 weight Silk Finish, 1 cone of Silk Finish 50 weight multi, and one cone Silk Finish 50 weight solid.


Enter using the app below. You can get a bonus entry for liking us on facebook and up to 10 extra entries when you share the giveaway on Facebook and a friend enters using your link!

*This giveaway is open to U.S. Residents only. Must be 18 or older to enter. Winners will be selected and announced on May 23rd.

a Rafflecopter giveaway

Monday, May 12, 2014

Reversible Round and Square Napkins

Combine a round and a square napkin for a unique and beautiful table setting! These napkins are reversible - so they are even more versatile!


Click here to download the free project PDF!

Friday, May 9, 2014

How to Make a Triangular Buttonhole

If you have only one buttonhole why not try a triangular one?


You will need:
  • Ruler
  • Marking pen
  • Paper for creating a template
  • Fabric you are adding buttonhole to (garment fabric)
  • Contrasting fabric for the center of the buttonhole
  • Mettler Metrosene Sewing Thread
Instructions:
  • First, make a triangle template. Draw a base the same diameter as your button.
  • Draw a vertical line up from the center of the base and perpendicular to it. This line should be the same length as the base.
  • Draw the sides of the triangle by connecting the top of the vertical center to the sides of the base.
  • Fuse interfacing to both the garment fabric and the contrasting fabric. 
  • Place the buttonhole fabric and base fabric right sides together.
  • Draw and stitch around the buttonhole template. 

  • Slash through both layers of fabric as shown. Make sure to snip right into the corners.

  • Pull the buttonhole fabric through to the WS and gently press.
 

  • Fold the buttonhole fabric, so that it fills the space you have made. Press.

    • Stitch the buttonhole fabric to the slashed sections of the garment fabric along the stitching lines used previously. This will hold everything in place. Press.
    • Trim the excess contrast fabric to about 1/4" away from the stitching line. 

    Thanks to Alison Smith for this great tutorial. Learn more about Alison here.

    Tuesday, May 6, 2014

    Easy Instant Gift Bag!

    This precious potpourri bag goes together quickly, can easily be made from fat quarters, and make a charming gift!

      Click here to download the pdf instructions.

    Makeup Brush Roll-up Case


    This handy roll-up case for your makeup brushes is a fun and easy project - and could easily be adapted for sewing tools or pens.

    Saturday, May 3, 2014

    Whole Cloth Baby Quilt

    Check out this beautiful baby quilt from Film in the Fridge!


    We love how the simple circle quilting makes this whole cloth quilt modern and fresh! This project would be a great one to use your favorite variegated Silk Finish thread.


    Check out instructions at Film in the Fridge.

    Friday, May 2, 2014

    Charger Caddy


    Have you ever had to recharge your electronic device and had to lay it on the floor? This is a quick, easy, and inexpensive remedy and can be used for the cord storage also - plus it's so fun to make!

    You can download the project instructions by clicking here. 

    Thursday, May 1, 2014

    How Much Thread Do I Need? - Thread Calculator

    If you're a quilter, I'm sure you've found yourself in the situation of wondering how much thread you need for your project. Nothing ruins a good all-night quilting session quite like running out of thread!

    This handy chart will take some of the guess work out of your next quilting project - simply find the size project you are doing and how heavy you plan to quilt it, and the chart will tell you how many spools you need!

    Click here to download the thread calculator pdf.


    The chart will also help you to choose the appropriate size spool to allow you to take advantage of the savings on larger spools - Mettler Silk Finish thread in 50 and 60 weight is now available in large cones - as large as 2000 yards for 50 weight silk finish. With larger cones, you can save over 60%.

    Check with your local sewing machine center or quilt shop for these new, larger spools.

    Have you ever run out of thread in the middle of a project? What did you do?